
Introduction
Pilot Chemical Company provides high quality chemical products and services to the disinfecting, sanitizing and cleaning; metalworking and lubricants; oil field and emulsion polymerization industries. Pilot’s laboratory for their chemical processing facility in Avenel, NJ had a floor that was a concrete slab with an additional failed overlay. To continue their commitment to safety and innovation, Pilot put a priority on upgrading their flooring system. Pilot’s primary requirements for the new flooring system were that it needed to be chemical resistant, seamless, impact resistant, easily cleanable, and long-lasting.
To complete the project, High Performance Systems, a resinous flooring contractor, was hired to install 1,000 sq. ft. (92.9 m2) of resinous flooring and 220 lf. (67 m) of cove base. Pilot’s laboratory renovation was on an expedited schedule, which required the floor to be installed in 4 days. To complete the floor on time, HPS Corp deployed a 7-man crew along with a certified OSHA compliance officer, Tom Pryor. To ensure worker safety, all workers wore safety glasses, steel-toed boots, ear protection, latex gloves, and respirators – when dust was present. Additionally, everyday started with a safety meeting where Pryor would review the objectives for the day and the safety considerations associated with completing them.
Selecting the flooring system
At first Pilot wanted to have a thin mil epoxy coating system installed in their laboratory however, Vice-President of High Performance Systems, Stephen Smedley, recommended a different flooring system to meet Pilot’s recommendations. Stephen Smedley explained that, “When I saw the customer’s requested flooring system I told them it was insufficient because an epoxy coating system is only going to be about 1/16” and considering the chemical and impact resistance they needed I knew it was not going to be a long-term solution.” HPS Corp specified, based on Pilot’s needs, a hybrid flooring system with a basecoat of cement slurry with a broadcast of 40/60 mesh silica, a broadcast coat of a high-solid epoxy with custom flakes, a grout coat of a UV and chemical resistant polyaspartic, and a topcoat of that same polyaspartic with 220 grit aluminum oxide additives. This decorative flooring system combines a fast curing, moisture insensitive, three-component base material with a mosaic broadcast, sealed with a high gloss, UV stable, clear topcoat.
Surface preparation
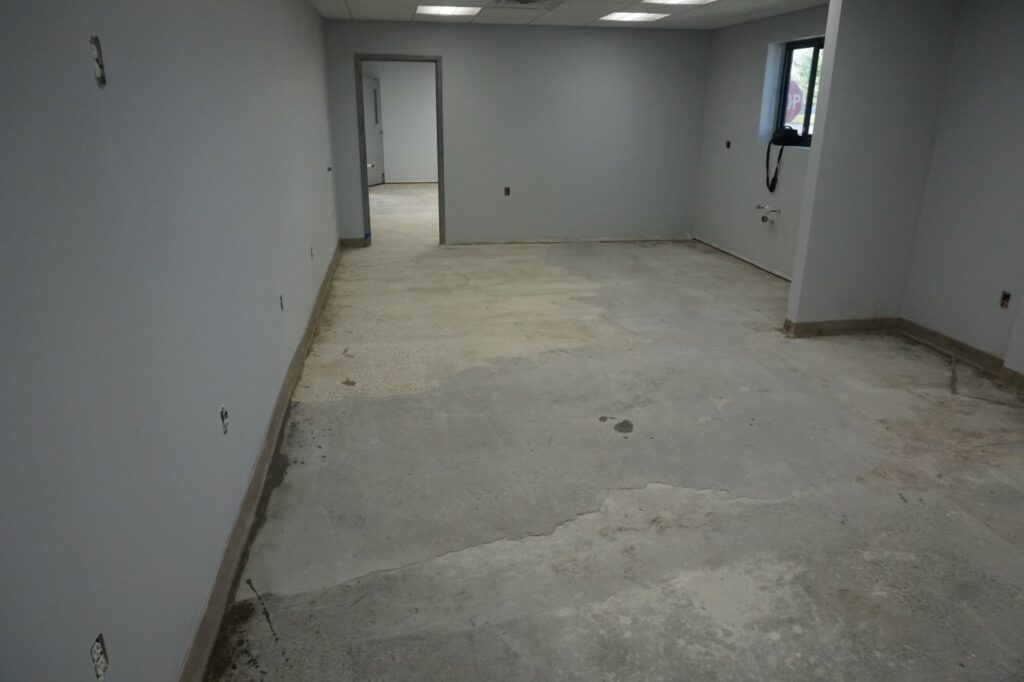
When Smedley completed the first site visit he figured out that the previous flooring system must have been tile because there was “ghosting,” an industry term that describes the grid like pattern left behind by tile. Because Smedley knew that tiling was installed, he knew that there were at least some areas of the floor that had a thin-set overlay. The problem with thin set is it is very soft and brittle – about 1,500 psi – so if a resinous flooring system is installed on top of it the floor will lack impact resistant and therefore not be durable. The area where the thin-set overlay was installed also covered up a drain, so the decision was made to chip out 3 yards of it to ensure the resinous products would bond to the underlying hard, dense concrete and cleaning the floor would be easy. When asked about the decision to remove the existing floor around the drain Smedley said, “We could tell that the thin-set overlay had moisture underneath it because it sounded hollow when you knocked on it and for us to put in a seamless flooring system and feel comfortable that the customer is getting a long-lasting flooring system it needed to be removed.”
To remove the thin-set overlay jackhammers were used. Once the removal of the thin-set overlay started Smedley realized that the thin-set was not only used in the area around the drain but also in other areas of the floor. This was a major setback for HPS Corp as they did not plan on excavation to be so extensive. Additionally, the drain was covered by 4” of concrete, which was much more than was originally anticipated.
After HPS Corp completed the excavation, a Lavina 30G-X was used to diamond grind the entire surface using 30 grit inserts to remove any surface contaminants and to establish a mechanical profile for the installation of overlay. While that was taking place, 2 workers created keyways at termination points, such as the doorways to rooms not having a flooring system installed. Stephen Smedley explained that, “The reason you need to have keyways is to maintain similar elevations from one doorway to another to prevent a tripping hazard where material is not being installed. Also, the keyways help maintain the manufacturer’s recommended thickness for the newly installed product.” To accommodate the thickness of the floor, 3/16”, the keyways were miter cut to ¼” depth and tapered back 2-2 ½” to create a gradual pitch into the surrounding areas.
Preparing overlay for resinous products
Before installing a new overlay, HPS Corp pre-primed the areas where there were potential moisture issues with TXP Fast Tru Epoxy Primer, a zero VOC, moisture tolerant, and alkali resistant primer that cures in as little as 6 hours. To ensure the floor would be flat and level, HPS Corp set elevations on walls and string lines on about 250 sq. ft., which created a box around the excavated areas of ½” of depth or greater. To fill in the excavated areas HPS Corp used Rapidset Cement all. Rapidset Cement All is a hydraulic modified cement with fiber reinforcement giving it a compressive strength of 9,000 psi (62.1 MPa).
Diamond ground rapid set overlay
Next, the areas that were not excavated were primed with TXP Fast, to ensure the subsequent products would bond to the underlying concrete, and then LevelFlor was applied to feather-out to a zero point. LevelFlor is an excellent product for leveling the floor because it can be applied at a very thing rate due to its finer aggregate loads. Moreover, it is quick setting and ready for foot traffic in as little as 6 hours. To meet the Pilot’s deadline, the excavation and TXP Fast priming was completed withing the first work day while the Rapidset Cement All patching, LevelFlor leveling, and diamond grinding were completed on the second day.
The next day the newly installed overlay system needed to be completely diamond ground so that the next products would mechanically bond. Smedley added that, “Diamond grinding also helps flatten any hand trowel marks or any deviations on the floor but more importantly we wanted to make sure there was intercoat adhesion between subsequent building materials.” To ensure a dust-free environment Smedley used a S36 Pullman Ermator, a HEPA filtered vacuum, while diamond grinding and then solvent wiped the entire floor.
Installing the Flooring System
The third day of the project a basecoat of FasTop SL, a self-leveling, urethane cement slurry, was applied. Smedley explained that he chose Fastop SL because “We had concerns about possibility of moisture, so we chose Fastop SL because it has moisture vapor transmission, cures in about 6 hours, and expands and contracts at similar rates to the subfloor.” Furthermore, FasTop SL is designed to protect against thermal shock, impacts, and chemical attacks. The material was applied with a squeegee and roller to ⅛” and broadcast to excess using 40/60 mesh silica. The reason silica was broadcast on top of the basecoat was so there was a surface profile for the next coat to adhere to. Once the material cured, the excess silica was vacuumed up and any imperfections, such as high spots, were smoothed out by screening the floor with 100 grit screened buffers.
After installation of FasTop SL
By the early afternoon HPS Corp was able to apply a broadcast coat of General Polymers 3569, a high-solids epoxy. The material was applied at a 1/8” thickness and pulled using a ¼” v-notched rubber squeegee at a spread rate of about 70 sq. ft per gallon, per manufacturer’s specifications. Once the coating was applied to the floor a custom blend of decorative flakes from Torgonol were broadcast to refusal and any vertical standing chips were scraped off.
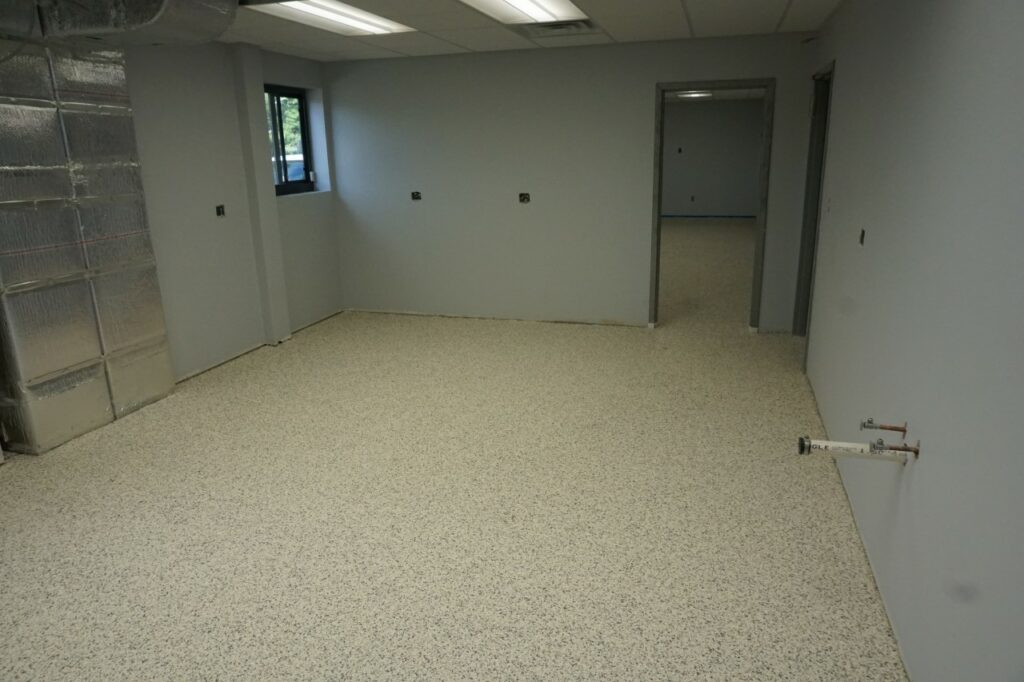
After the custom flake was broadcast
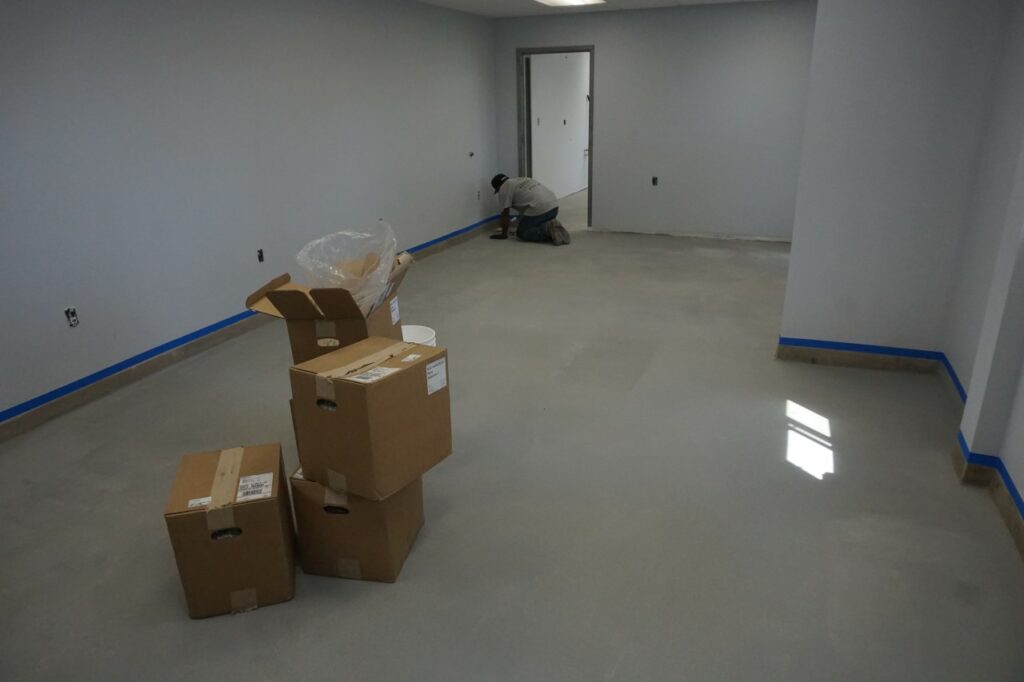
On the fourth day 2 coats of clear polyaspartic were applied. The first coat, commonly referred to as the grout coat, was used to encapsulate the decorative flake chip while the second coat, also known as the topcoat, had 220 aluminum oxide additives to provide UV protection and add slip resistance to meet the client’s specifications. When asked why a polyaspartic was chosen as the grout and topcoat Smedley explained, “due to the time restraints, a polyaspartic was far superior to urethane because you are at a 6-hour cure as opposed to a 24-48 hour cure.” The product, General Polymers 4850, was also chosen because it is designed to withstand scratching, abrasion, chemicals moderate impacts, punctures, and stains while providing the same level of chemical resistance as most urethane topcoats. Additionally, this product has a low VOC output, <10 g/L mixed, so it is very low odor.
The application of GP 4850 is simple because it is self-leveling, so it minimizes the potential for roller marks and creates a uniform, smooth finish – even on large floors. The materials fast cure rate was helpful for completing the floor on time, but it made application stressful because there was not much time to work with it – about 15 minutes. The material was applied at the manufacturer’s recommended spread rate, of 125 sq. ft. (11.6 m2) per gallon, to achieve 7 mils (178 microns) of thickness and was applied using a squeegee and back roller.
In between every step of the flooring installation, 220 lf. of 4” high ¾” radius cove base was installed along the perimeter of the room to increase cleanability and eliminate crevices that can harbor bacteria and debris. HPS Corp worked carefully and in conjunction with Pilot to ensure cove base was not installed where cabinets would be.
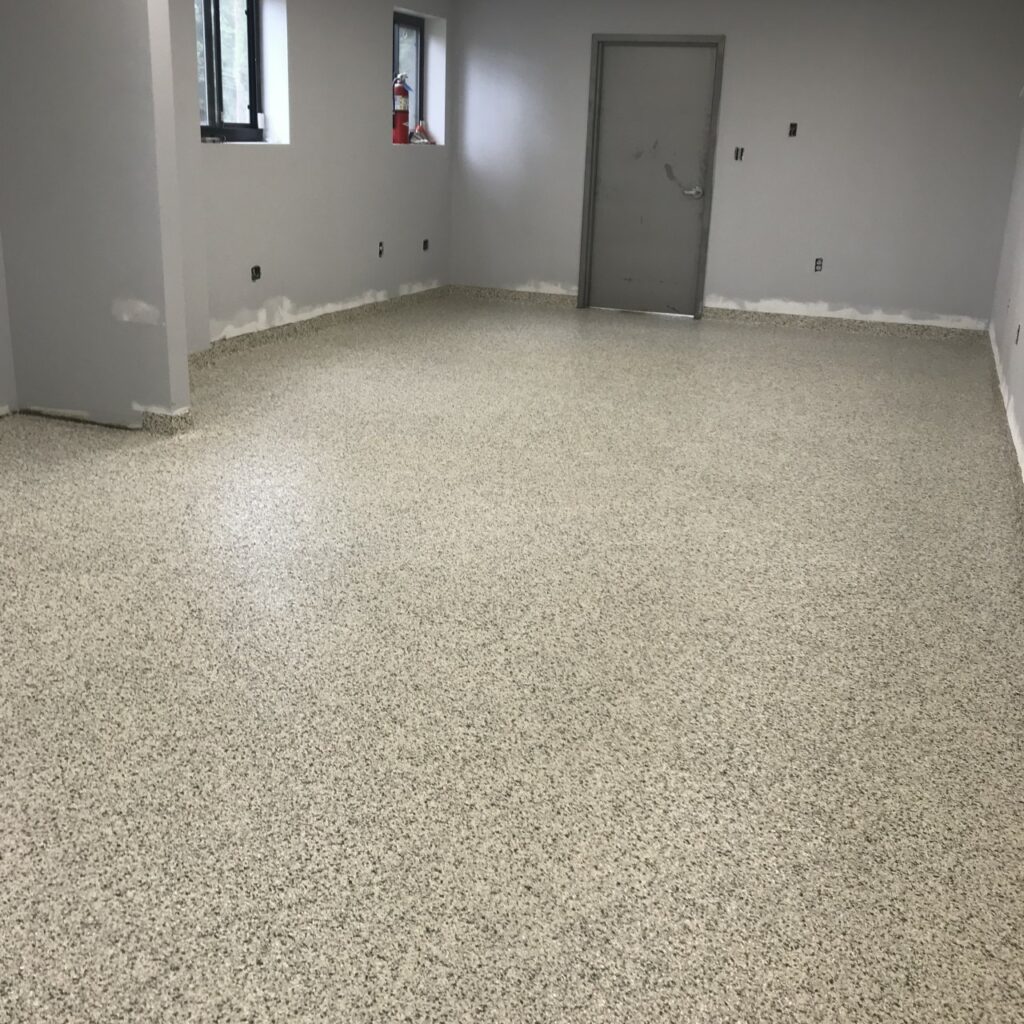
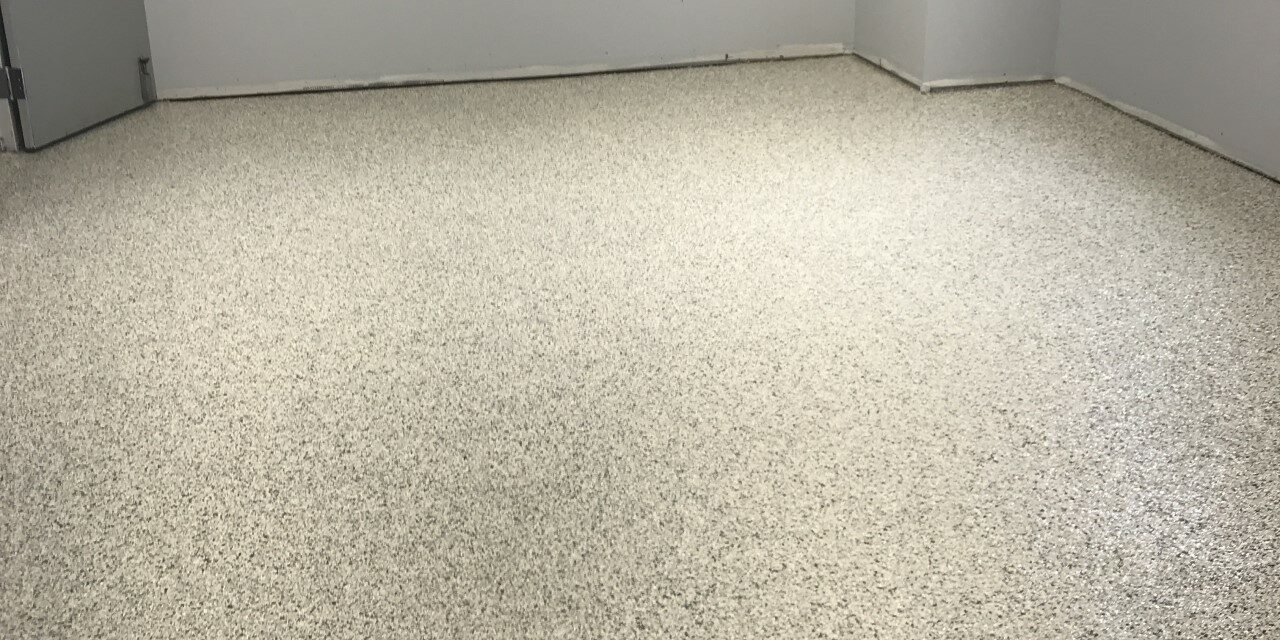
Finished floor with cove base
A job well done
The finished floor was gorgeous and completed in 3 days – right on schedule. Due to the excellent installation and change in product specification, Pilot is sure to have a durable floor that will be able to withstand harsh laboratory conditions for a decade or more. In the end, Pilot Chemical Company was left with an attractive, seamless floor that met all their requirements and specifications. To see a video and learn more about this project use the following link: https://www.highperformancesystems.com/chemical-resistant-epoxy-floors


